4 minutes
Create and Deploying Your First Hugo Site to Github Pages
Creating and deploying your first Hugo site to Github pages
 A local duck I photographed recently
This is a comprehensive guide for creating your first static site using Hugo and hosting it on GitHub pages.
Creating your site
First, make sure you have Hugo installed on your machine.
Now you can run these commands to make your first site.
And there you go! You’ve created your first Hugo site. I mean, there’s nothing in it, but still! Let’s take a look.
hugo server -D
Your web server by default should be hosted at http://localhost:1313/.
There should be nothing here. We have to add themes, content, and lots of other fun stuff.
If you navigate to
Hugo, you can see a
complete list of themes that you can use to style your site. In
my own personal Hugo site I, use
Minimal, so
let’s start there. First we need to initialize our Github repo,
add the theme as a submodule in themes/minimal and
copy the default config file for that theme.
git init
Now when you host your server, you should notice that you have the exact demo page shown on the theme’s page.
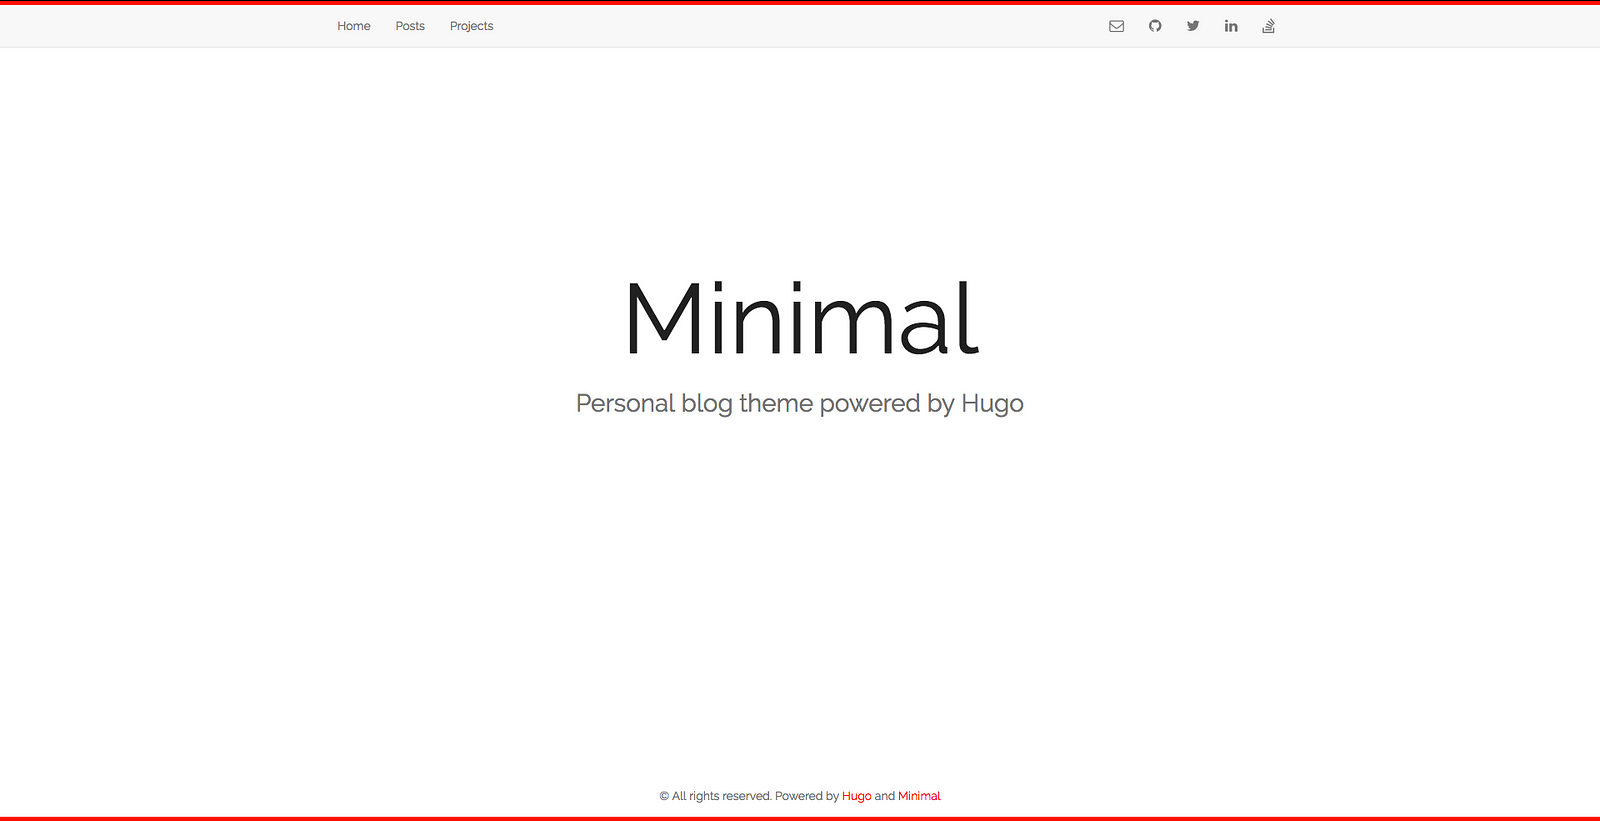 Hugo’s Demo Page
Once that is set up, you should be able to customize it! If you navigate back to our Minimal theme’s documentation page you should find a small guide on using the parameters to customize the aesthetics of your site.
Once you’re done making your site *beautiful, *you can navigate
back to Hugo’s
Getting Started page
and generate actual content for your site. Generating content on
your Hugo site is super important because Hugo won’t generate
your subpages unless there is content to display (or if your
content is in draft: true).
Deploying
This is where things get tricky.
Github pages doesn’t natively support Hugo like it does Jekyll
(another SSG) so we’re going to have to create two Github
repositories; one to hold your Hugo site and files, and one to
hold the HTML files we have to generate for your actual Github
page to read and render. Once you’ve created your remote repos
on Github <username>.github.io and
hugo_site we need to connect them to the site we
just made.
First, let’s sync our repo and our code base and add
<github_username.github.io> as a submodule to
our existing repo just like our theme.
git remote add origin
:<github_username>/hugo_site.git
git add .
git commit -m "Initial commit for our Hugo site."
Remember, this only pushes to hugo_site . We still
need to generate our html pages for our
<github_username> repo. Hugo already has a
built in command, Hugo, that generates your files
to a Public folder. We need to change our
config.toml file to output our HTML files to our
submodule <github_username>.github.io.
Open your config.toml:
baseURL = "
"
languageCode = "en-us"
title = "Minimal"
theme = "minimal"
disqusShortname = "username" # delete this to disable disqus comments
googleAnalytics = ""
publishDir = "<github_username>.github.io"
The default config.toml for the Minimal theme
should look a little like this. However, here we added in
publishDir. This tells Hugo where to create our
HTML files from the content in our Hugo site.
Let’s generate them by running the following command:
hugo
And that should be it. Hugo already comes built with a simple
command to generate the HTML from any of the customizable
content in your site. If you look in your
<github_username>.github.io folder now you
should see HTML and CSS files, stuff that Github pages
understands!
Before we finally deploy, we need to make sure our remotes our set up correctly one last time.
cd <github_username>.github.io
git remote -v
> origin
:<github_username>/<github_username>.github.io.git (fetch)
> origin
:<github_username>/<github_username>.github.io.git (push)
Now let’s host it!
git add .
git commit -m "Oh my goodness, I'm hosting my first Hugo website!"
git push origin master
Go to your Github page
<github_username>.github.io. You should see
your very own custom Hugo site!
If you have any trouble please leave a comment below! You can follow me on Medium and Github to see more fun stuff I’m working on. I’m also a moderator of a programming Twitch channel you can check out to see how small open source packages are made!
If you want to see what else our engineering team is working on, come join us at Ambassador!
714 Words
2018-04-29 10:00 -0500